Exercise 02
Practice Reproducible Research Workflows
Learning Objectives
- Integrating an RStudio project, a local git repository, and a GitHub remote repository
Challenge 1
Begin with a remote repo…
Follow the instructions outlined as Method 1 in Module 6 to do the following:
Step 1
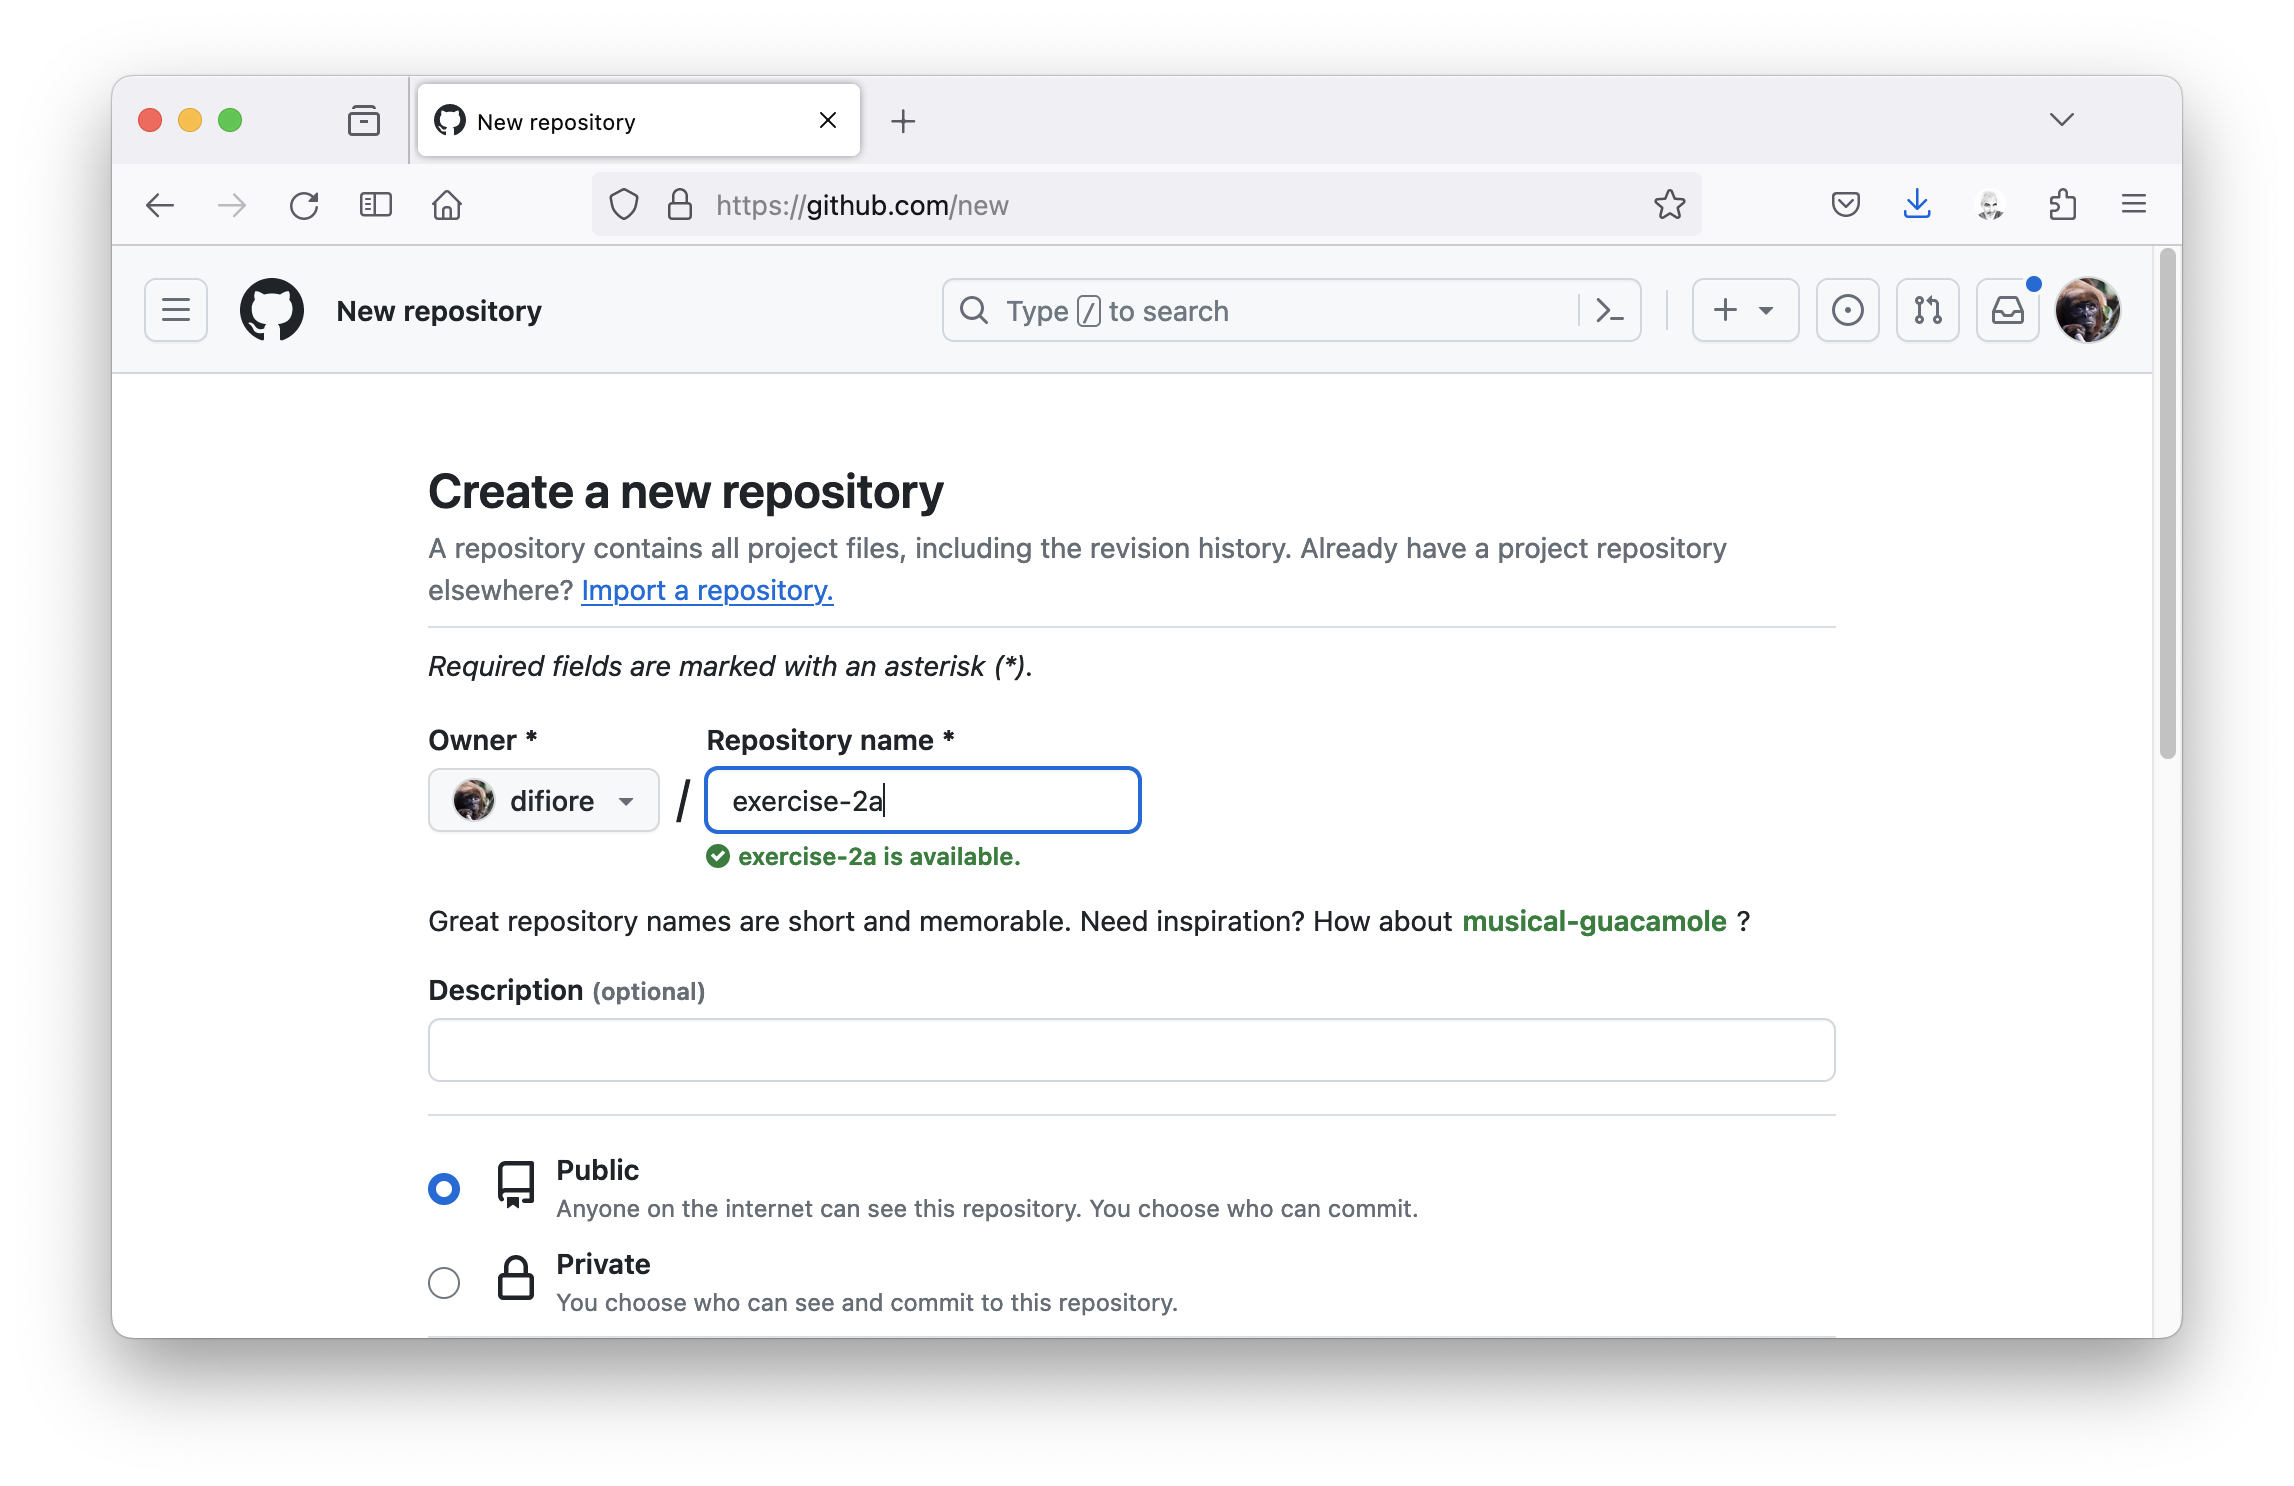
- Set up a new GitHub repo in your GitHub workspace named “exercise-02a” (be sure to use this name and capitalization EXACTLY).
Step 2
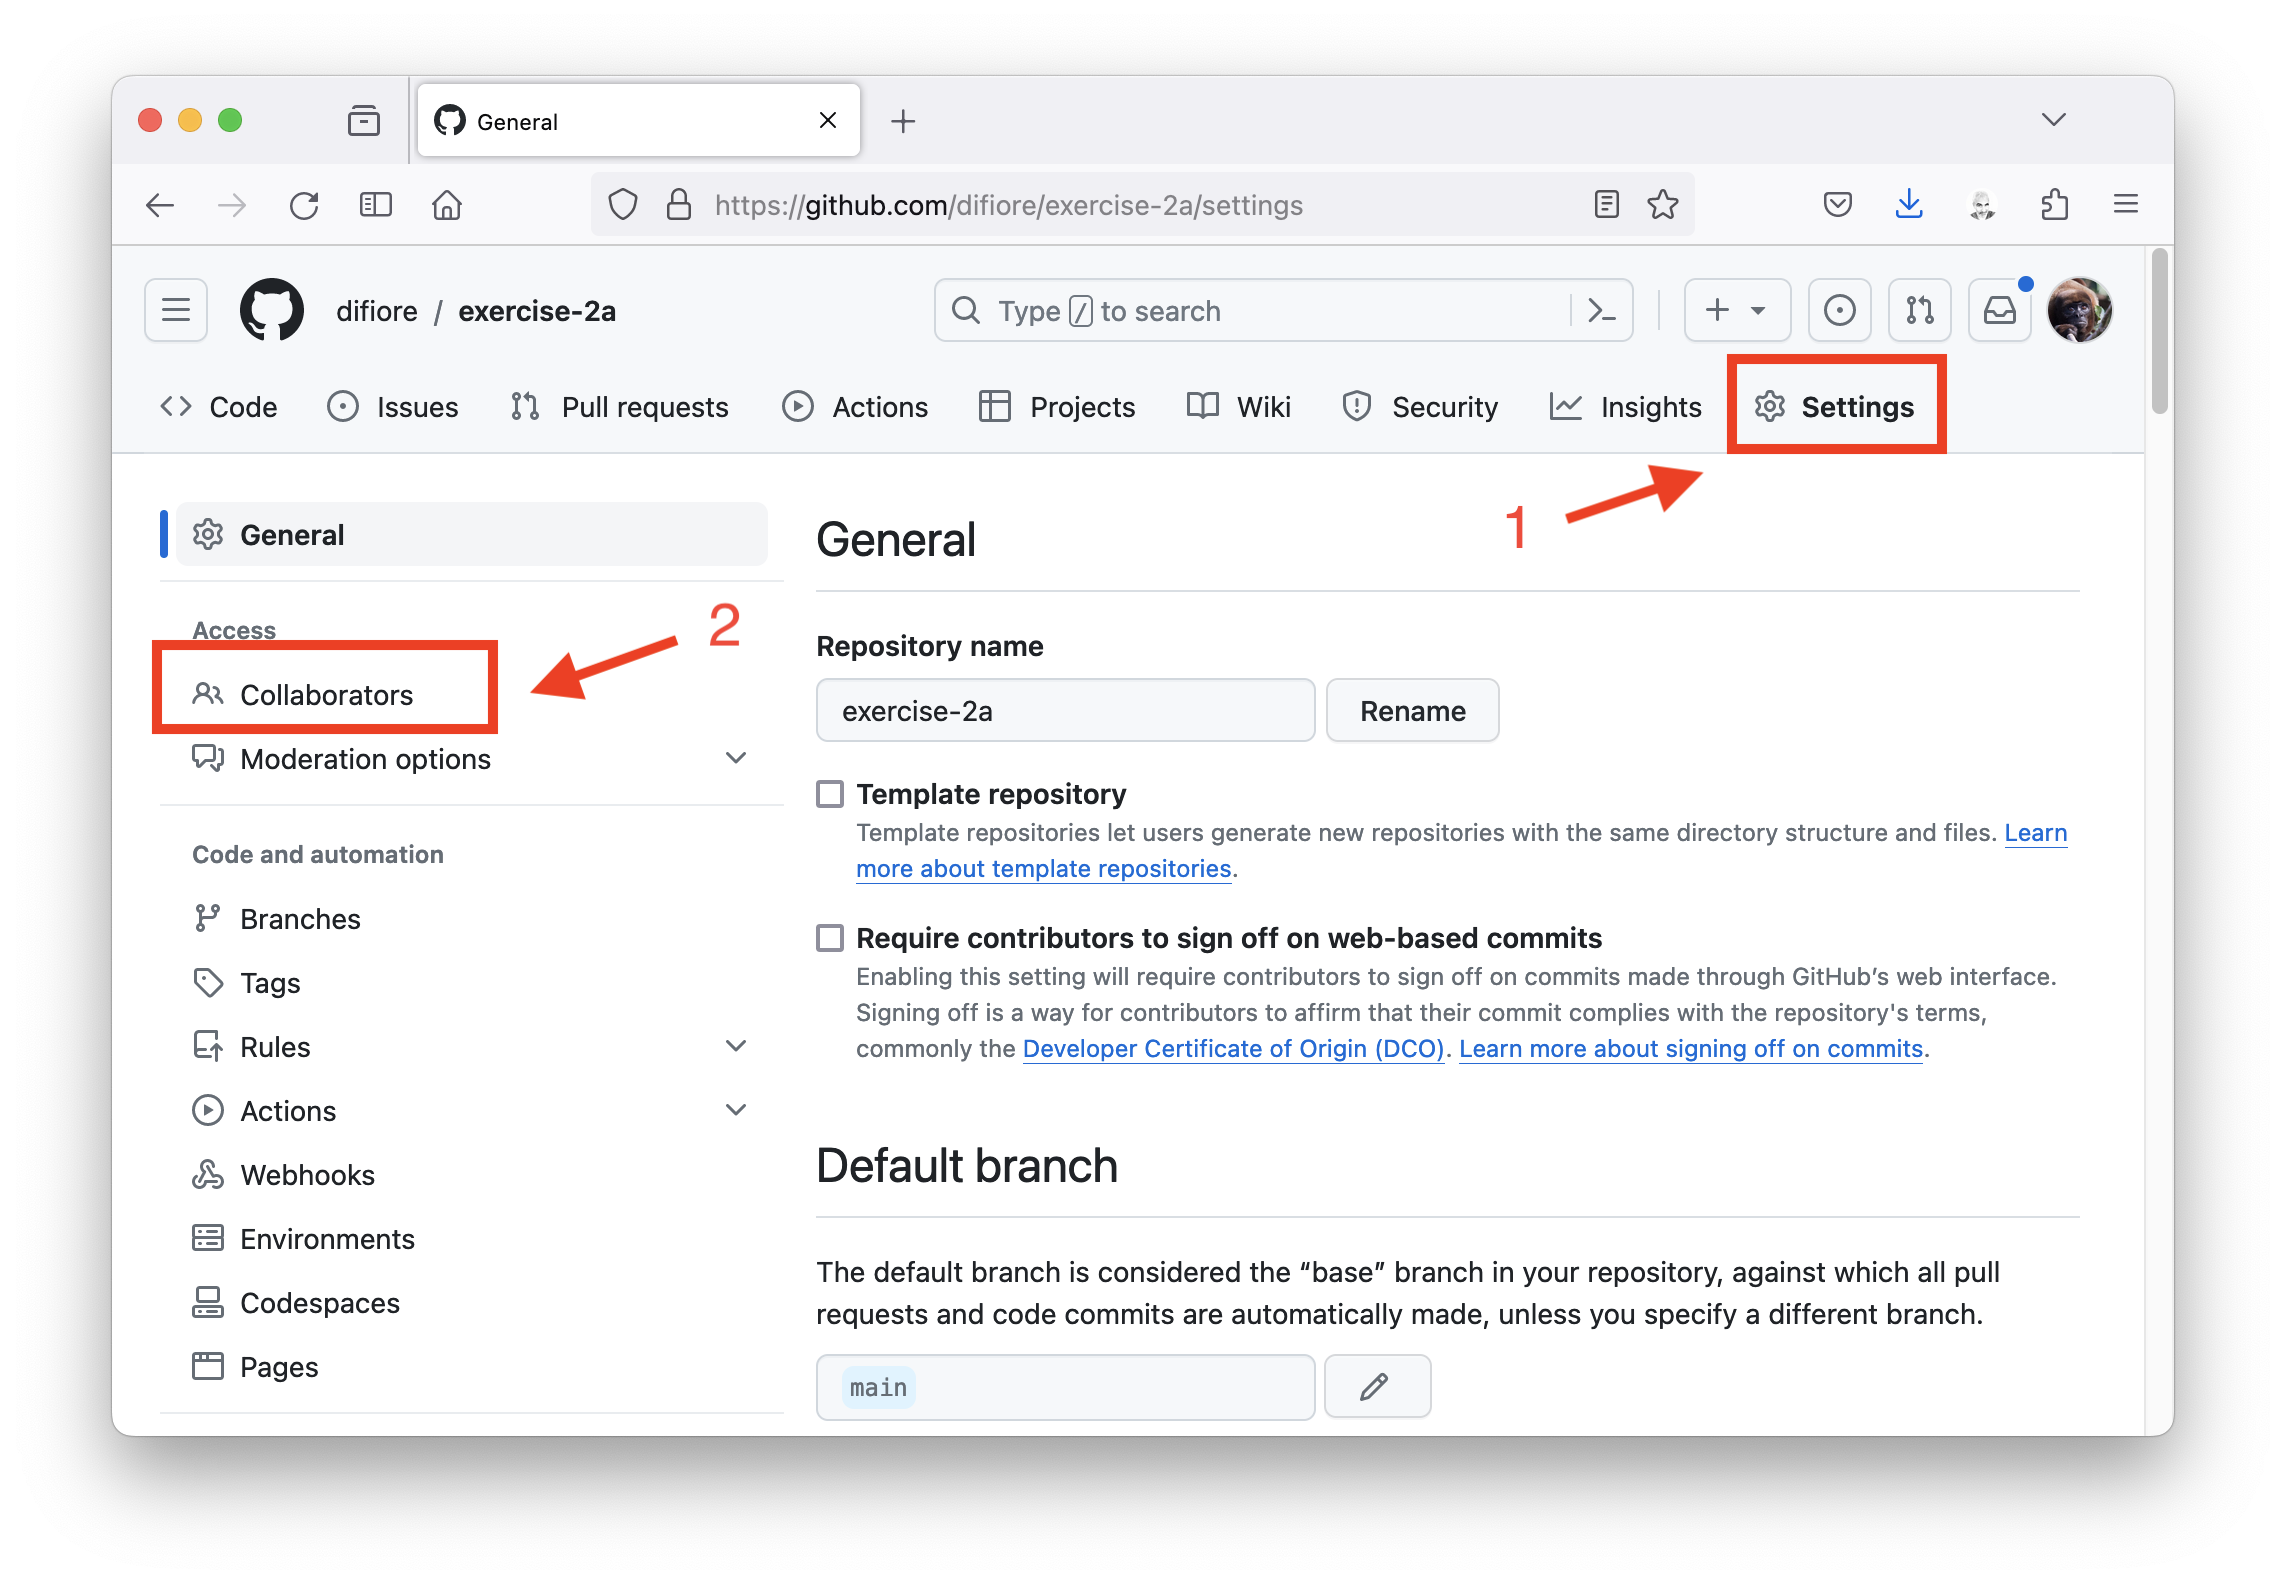
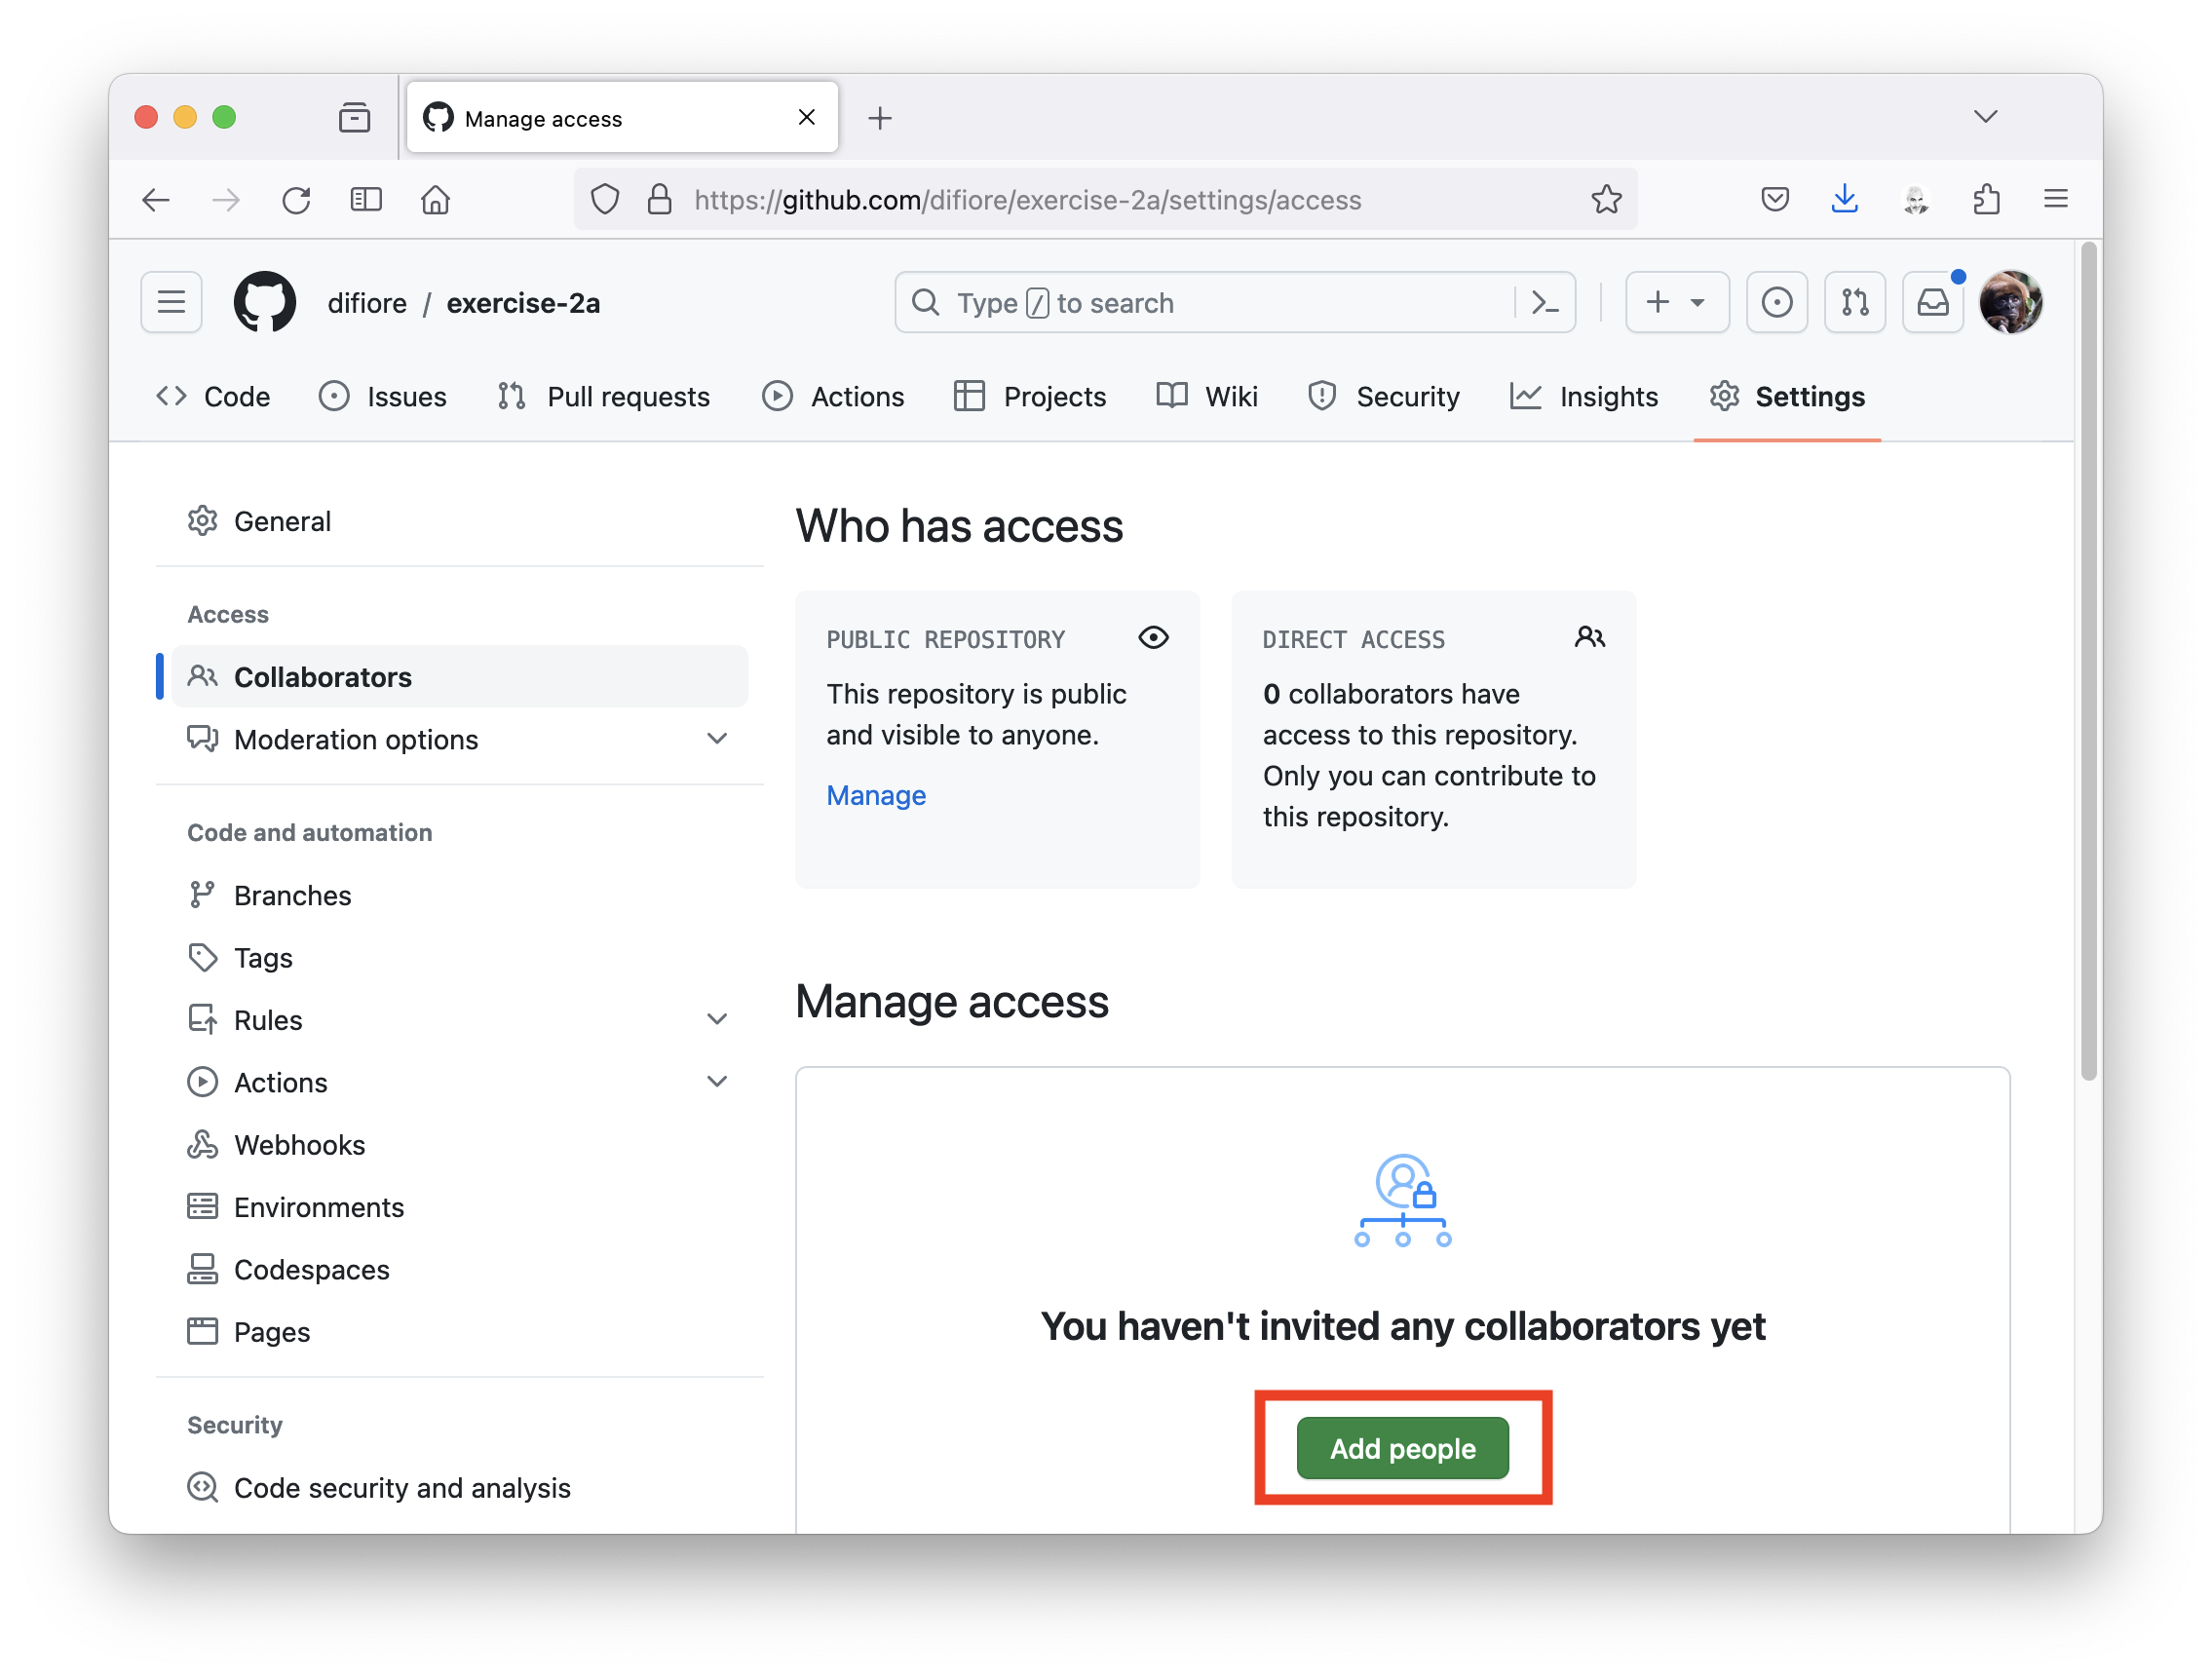
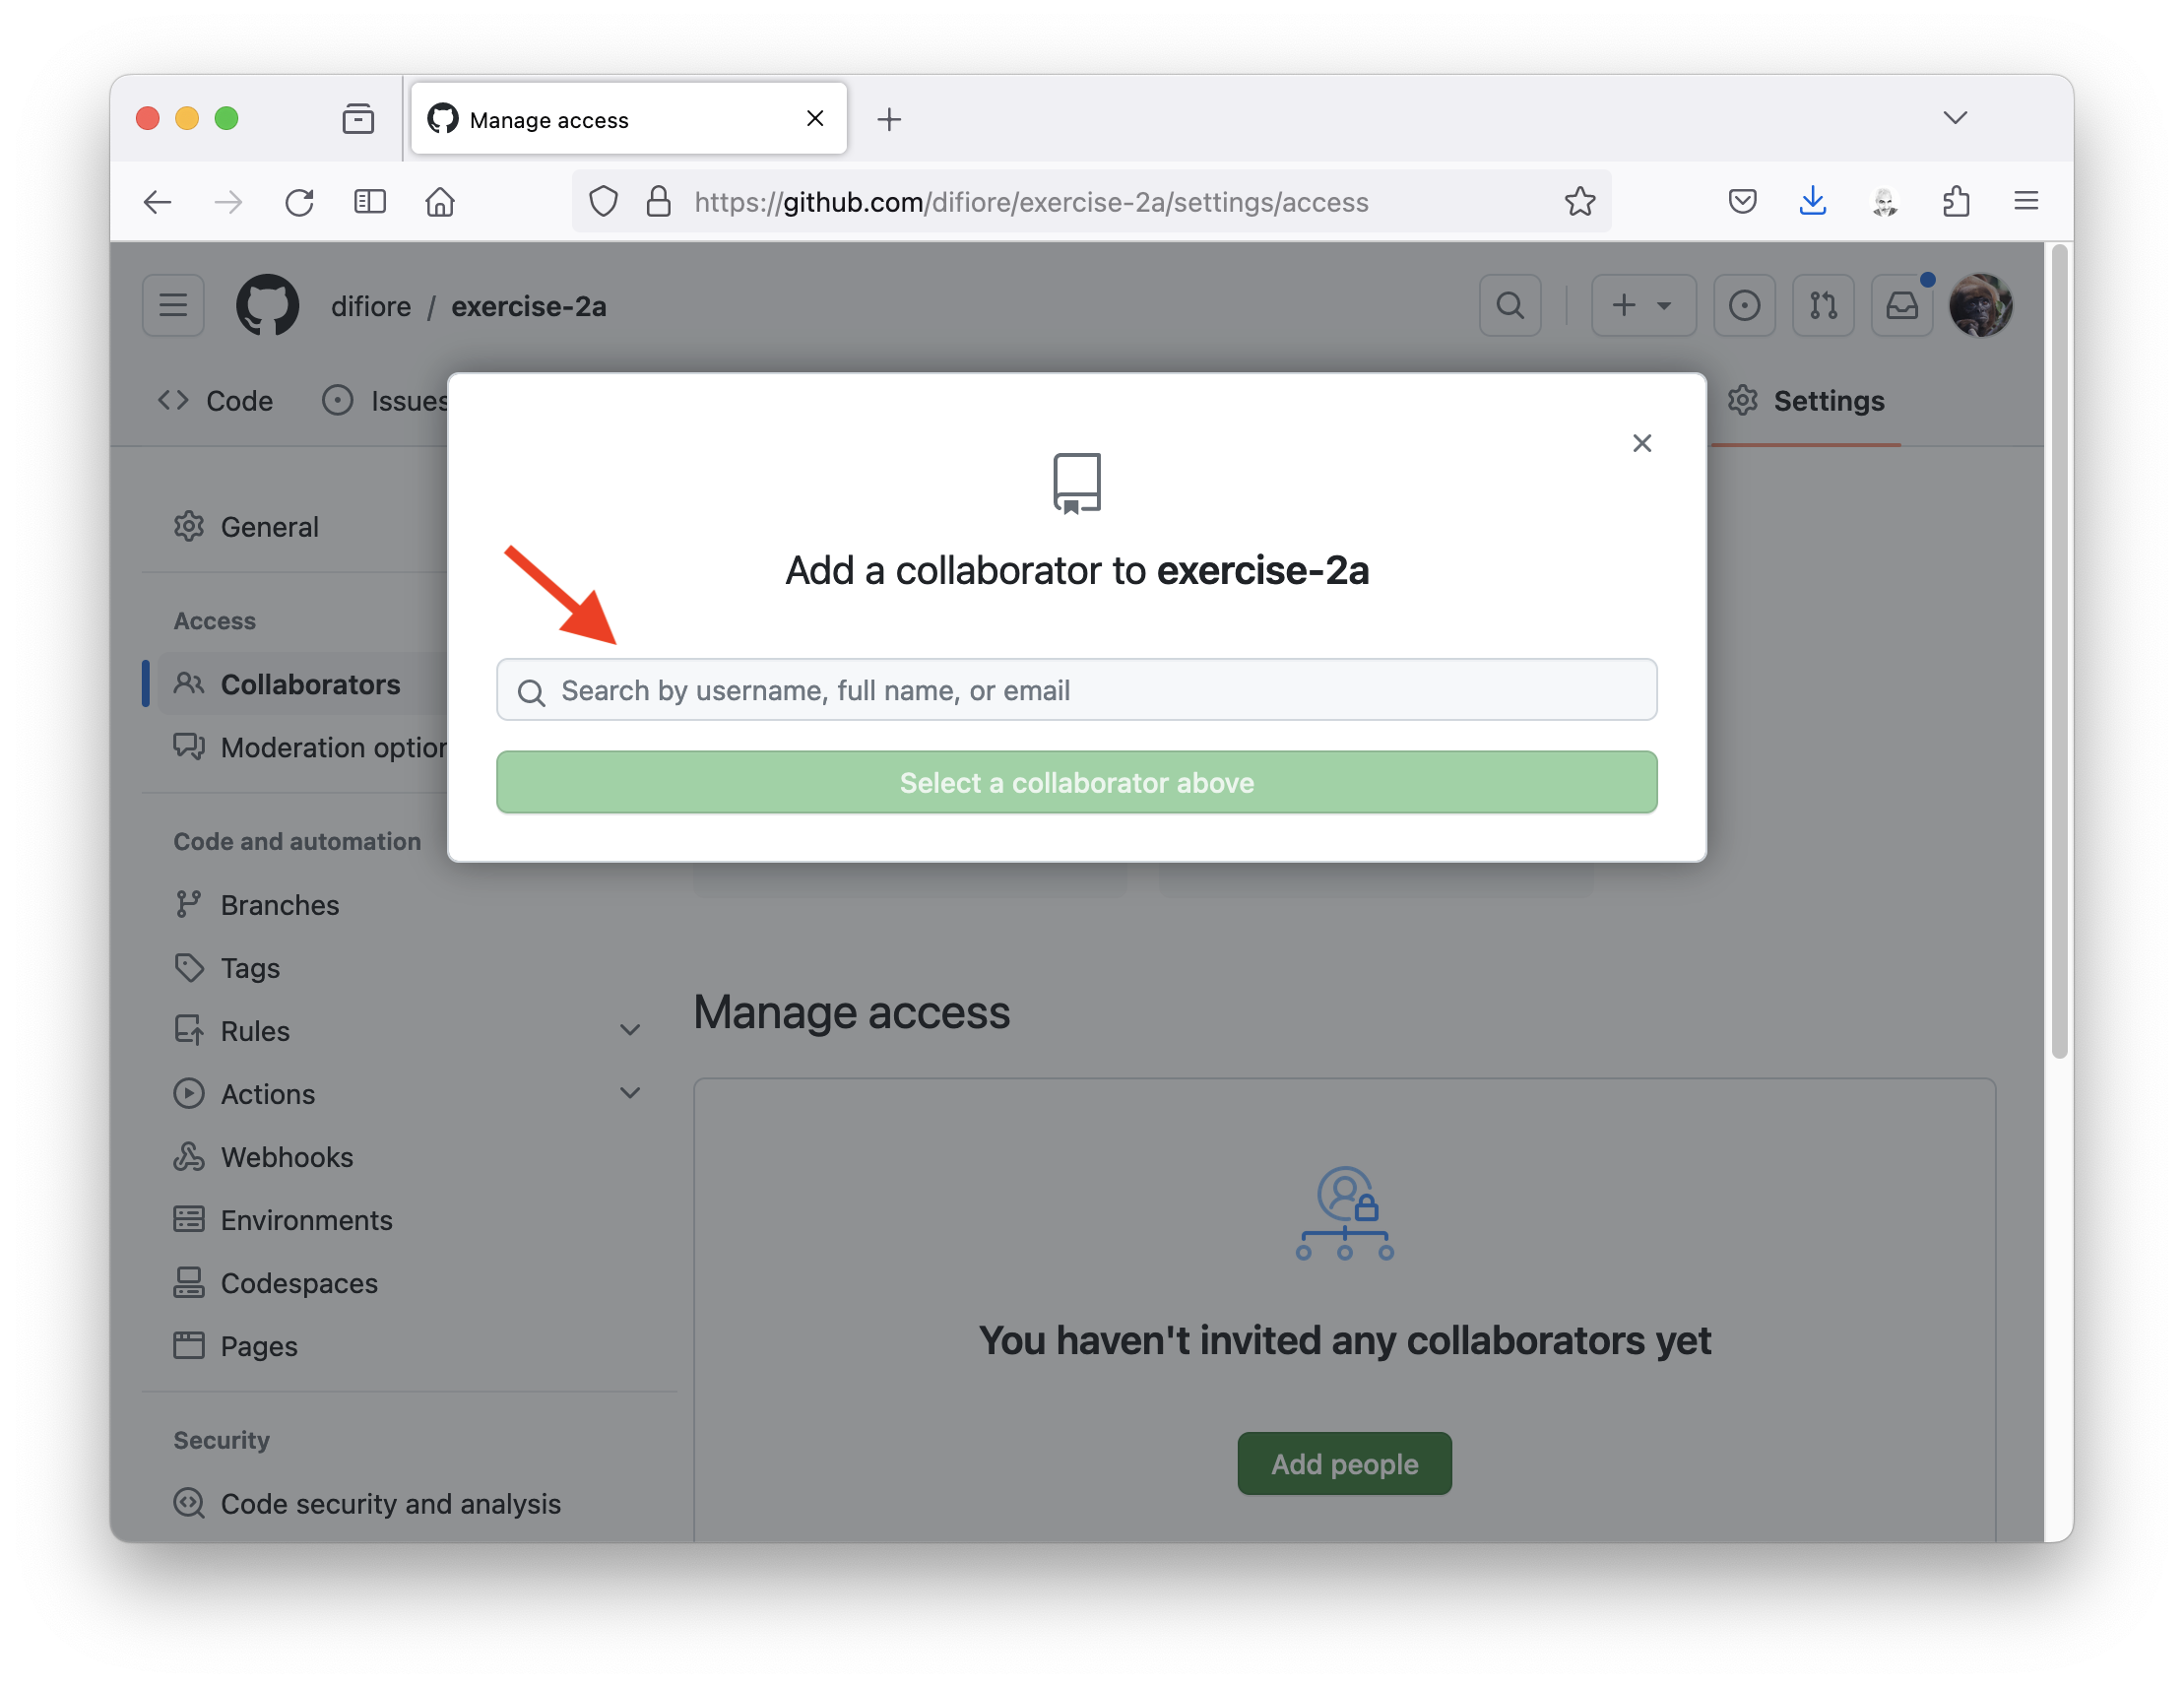
- Add me as a collaborator on the repo by going to “Settings”, choosing “Collaborators”, then “Add People”, and searching for my GitHub username (“difiore”).
Step 3
- Clone your repo to your local computer.
Step 4
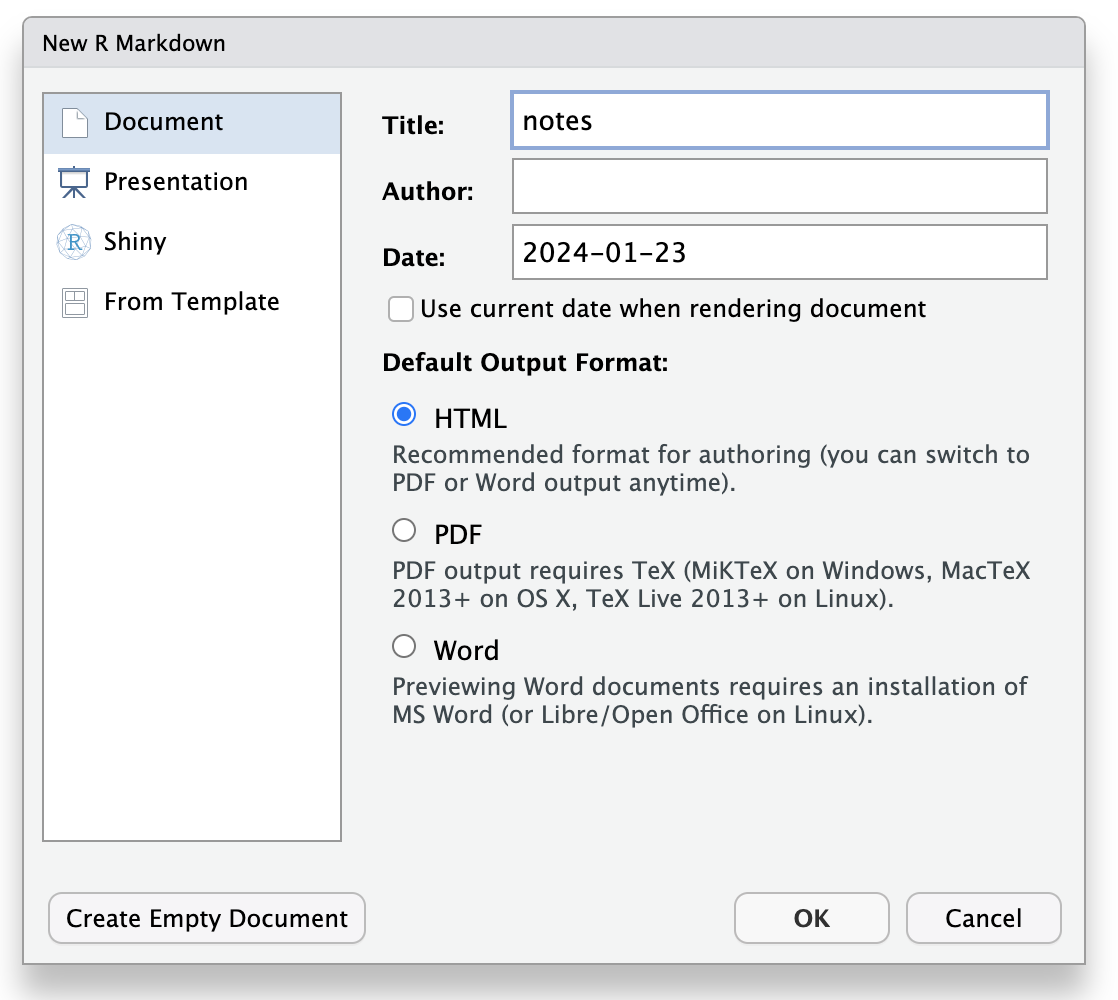
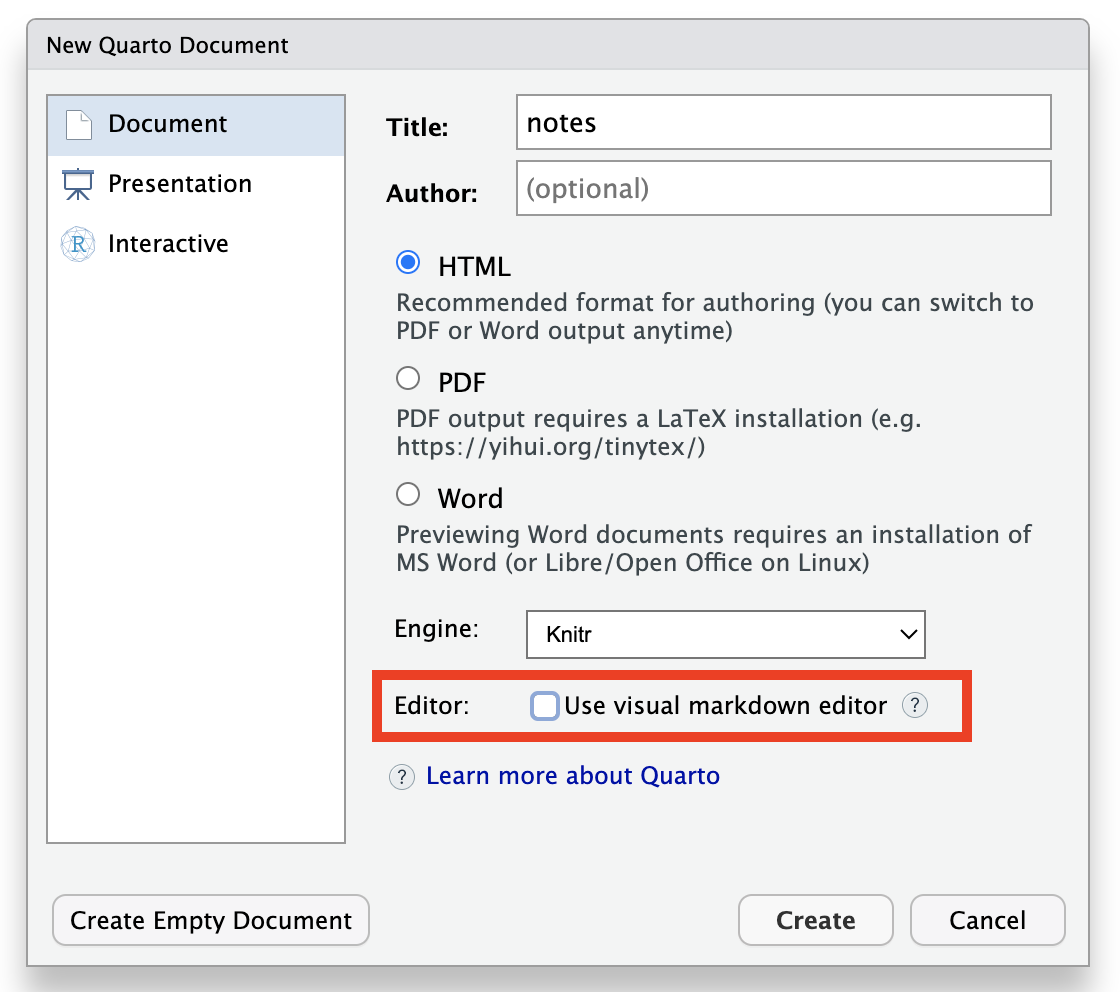
- Create a new Quarto or RMarkdown document locally with notes you take in class this week – call it “notes.qmd” or “notes.Rmd” – including at least some expository text written in Markdown and at least one R code block. If you make a “.qmd” document, I recommend unchecking “Use visual markdown editor”, though that is your choice.
… OR …
Step 5
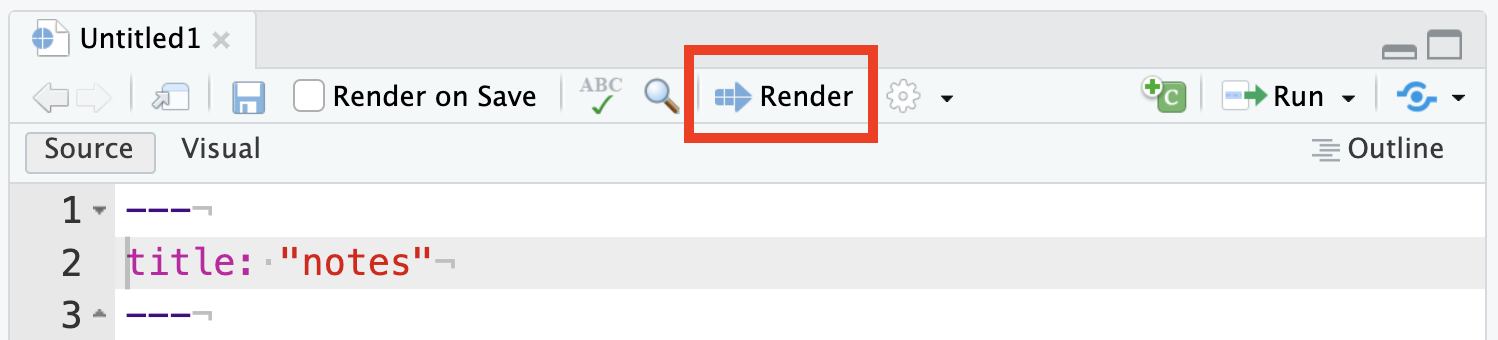
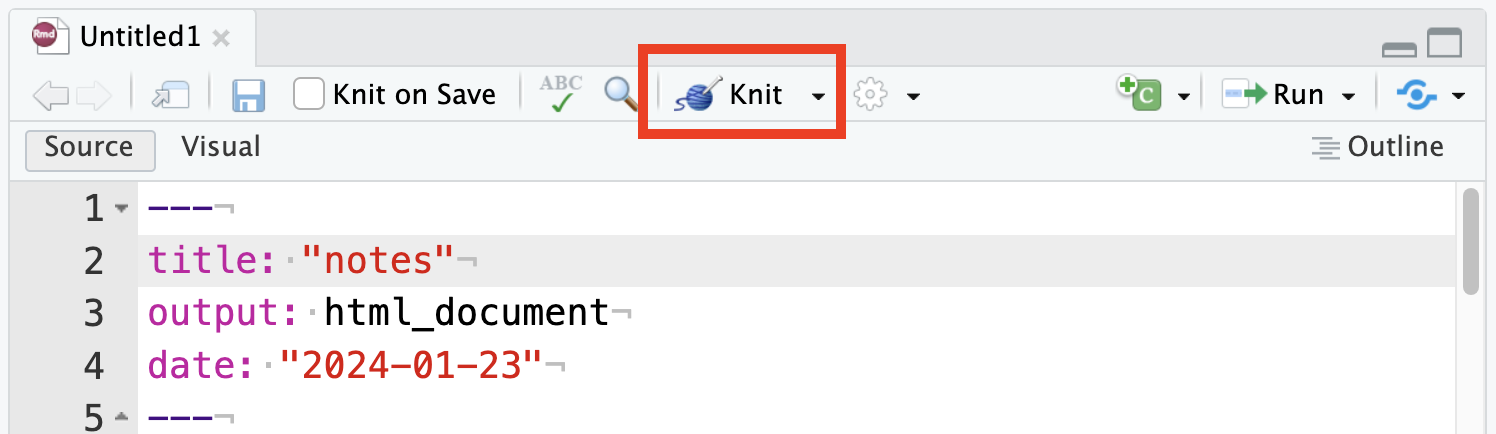
- Use
Render(for “.qmd”) orKnit(for “.Rmd”) to publish your document as HTML.
… OR …
Step 6
- Stage (or “add”) and “commit” the changes to your repo locally and then “push” those up to GitHub.
Step 7
- Visit your repo on GitHub to confirm that you have done the above steps successfully.
Step 8
- Submit the URL for your repo in Canvas
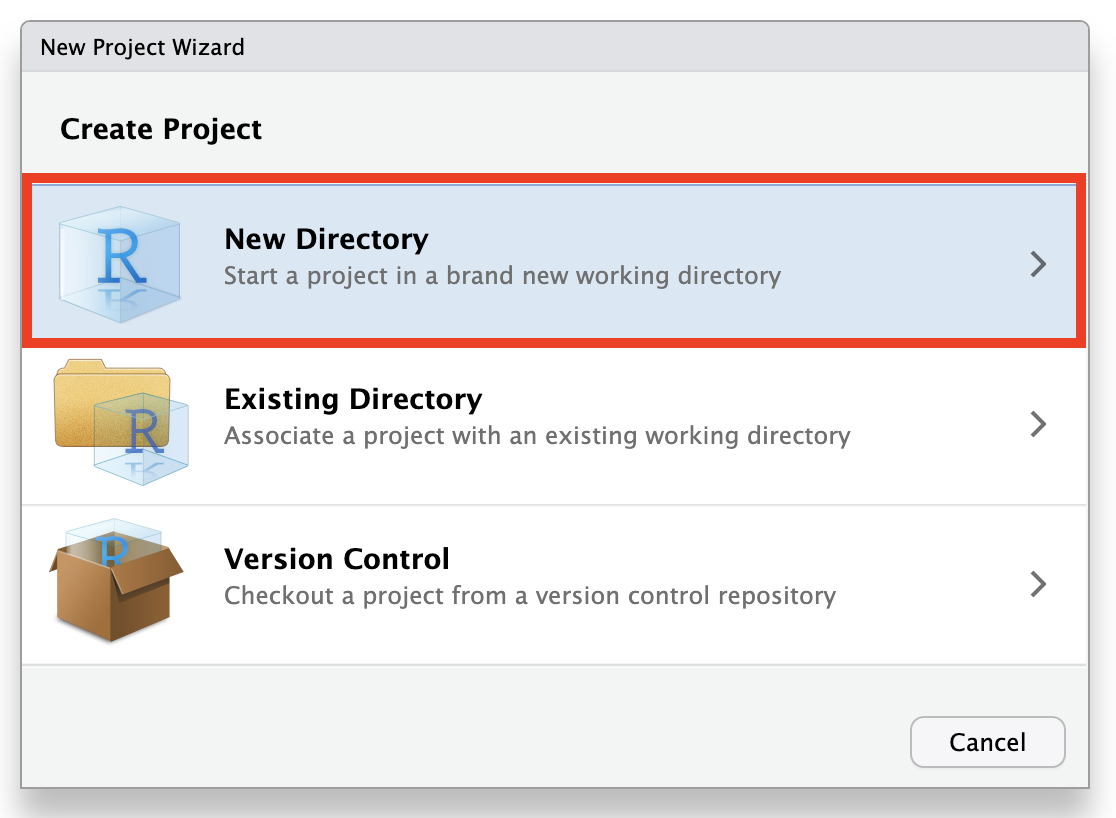
Challenge 2
Begin with a local repo…
This is an alternative workflow to that described above, which also works well. It is outlined in more detail in Module 6 as “Option 3” under Connecting a Local Repo to GitHub.
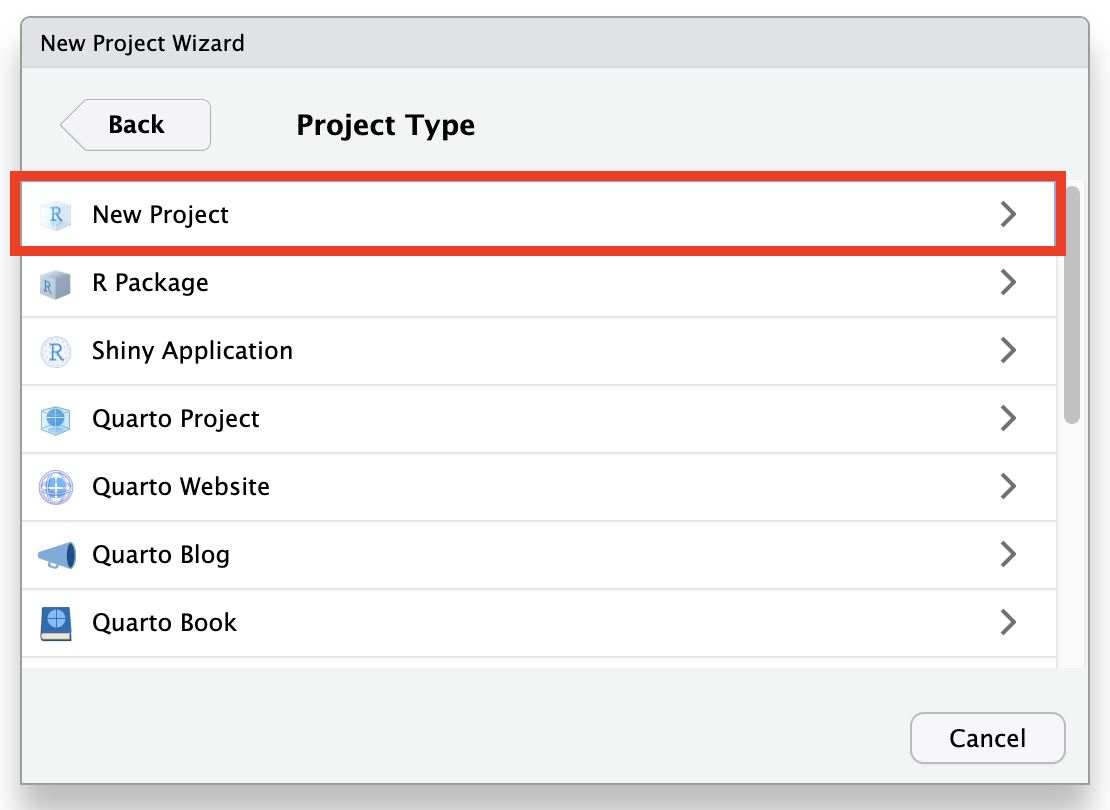
Step 1
- From within RStudio, create a new project called “exercise-2b” in a brand new directory also called “exercise-2b” (be sure to use this name and capitalization EXACTLY).
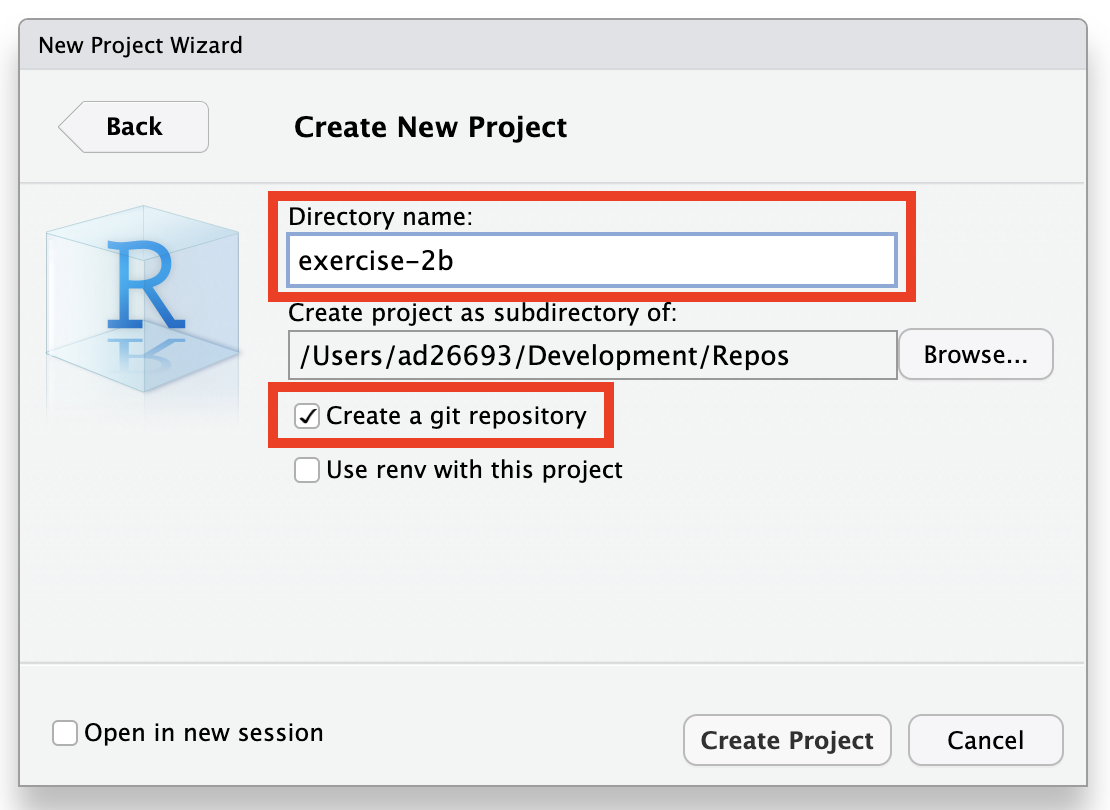
NOTE: Be sure to check the box marked “Create a git repository” before pressing the “Create Project” button.
After making the repository, you will need to make a first commit to get git to begin tracking changes.
Step 2
Step 3
- As outlined in Module 6 Connecting a Local Repo to GitHub Option 1, open your project locally and run
usethis::use_github(protocol="https")from the R console within your project’s working directory.
Step 4
- Answer the question about whether the suggested name for the remote repository is adequate and hit
. [This question may not always appear.]
This will create a new remote repository on GitHub, add it as a remote origin/main, and open the GitHub page for the repository in your browser. Switch back to RStudio and continue with Steps 4 to 8 from above.